
Honey extraction might seem like a mystery, but once you get to grips with the basics, it makes total sense. Setting Up A Honey Extraction Room is nessesary to start the process of removing honey from the frames of a beehive without damaging the bees or their precious honeycomb. The goal is to do this as efficiently as possible while keeping everything squeaky clean to maintain the quality of the honey.
Now, what do you need to make this whole thing work? First off, a safe, clean space is key. You’ll want a room that’s easily washable, has good drainage, and is free from contaminants. It’s not just about keeping things tidy—it’s crucial for ensuring your honey stays pure and safe to eat. A bee-proof window or door would be nice too, to avoid bees from sneaking in.
Besides the room itself, basic equipment is a must-have. Think honey extractors, uncapping knives, and settling tanks. Don’t forget personal protective gear for those sticky situations! If you’re setting up a space dedicated to extraction, all this gear can be organized and ready to go, reducing the hassle of setting up every time.
Why bother with a dedicated space for extraction? Well, it’s about efficiency and quality. Having your own setup means you can operate at your own pace and schedule, ensuring you’re working under the best conditions. Plus, by controlling the environment, you help maintain the honey’s flavor and quality, preventing contamination and spoilage.
A dedicated honey extraction room isn’t just a luxury—it’s part of producing high-quality honey. With the right setup, you’ll be able to enjoy a smoother, quicker, and cleaner extraction process, letting you focus on what really matters: enjoying the fruits of your bees’ labor!
Setting Up Your Ideal Honey Extraction Room
Picking the right spot for your honey extraction room is the first step toward creating an efficient workspace. Ideally, this should be an area that’s easy to clean and can accommodate all your equipment comfortably. Having a space with good ventilation and lots of natural light can make the process a lot more pleasant.
When it comes to equipment, there are a few essentials you can’t do without:
- Honey extractor.
- Uncapping tools.
- Honey filtering equipment.
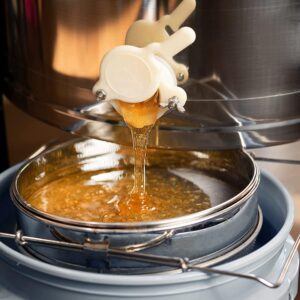
- Honey Bucket with Spigot for tapping.
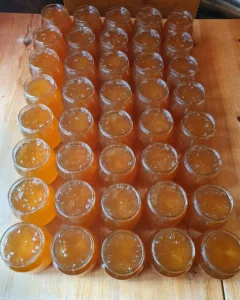
- Glas jars or plastic bottles for your honey.
- Containers with mesh for the uncapped wax.
- Shelving or storage units can help keep everything organized, so you’re not tripping over gear every step you take.
Cleanliness is king in an extraction room, not just for the health and safety of the honey but also to comply with local health regulations. Consider using non-slip mats and splash-proof surfaces to ease the cleanup process. Having a sink or easy access to water will make washing up a breeze, which is super important because you need from time to time during the process, clean the tools, otherwise they will get to sticky and hard to handle.
Keeping bees out of the extraction room is just as important as keeping honey in it. The best is if the room is located some distance from the hives. A bee-proof entryway does wonders in preventing unwanted guests. Nets or screens can help if you have windows, while sealing doors tightly ensures there are no sneaky entry points.
Lastly, don’t underestimate the power of a good workflow setup. Arrange your equipment in a way that follows the flow of the extraction process, starting with uncapping, leading to the extraction stage, and ending with filtering and storage. This cuts down the time spent running around and helps speed up the entire process, making sure you’re working smarter, not harder.
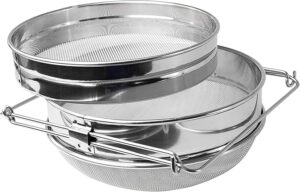
Honey Strainer from Amazon
Maximizing Efficiency: Tips and Techniques
Running a honey extractor efficiently is half the battle won. On average, getting through one batch could take anywhere between 10 to 20 minutes, depending on the type of extractor you’re using and the number of frames you have. Going electric can shave off a few minutes, making things a bit smoother and less labor-intensive.
Choosing between a manual or electric extractor often comes down to preference and budget. Manual extractors give you more control and are typically cheaper upfront, but they can be pretty labor-intensive, especially if you’ve got tons of frames to get through. Electric extractors, on the other hand, tend to be pricier but offer speed and ease, proving invaluable when you’re dealing with larger volumes.
Here it’s important to start extracting at slow speed, then turn around every frame inside the extractor, if you don’t have a self-turning extractor, and continue with slow speed. Then stop and turn every frame again and now you can continue at a higher speed. Then repeat the process. The reason why you should do like this is that if you start at full speed from the beginning, there’s a big risk to brake the heavy honey combs inside the frames.
The best temperature for extracting honey? Aim for a warm room—around 77°F to 86°F. Warm honey flows more freely, which means less work for you and your equipment. If things are a bit chilly, you might end up with thick honey that’s tough to manage.
Efficiency isn’t only about the speed of the extractor. It’s also about optimizing each step—from uncapping the honeycomb swiftly to positioning frames correctly inside the extractor. Every small improvement adds up, saving you time and effort in the long run.
Ultimately, blending these tips and techniques paves the way for a seamless honey extraction process. Reducing downtime and ensuring every piece of equipment is at hand means smoother operations and a more productive honey harvest session.
Storage and Timing Considerations for Honey Extraction
Storing honey frames before extraction requires some foresight. Ideally, you want to extract honey as soon as you can, but life happens, right? So how long can you keep those frames on hold? A couple of days up to a week is generally okay, provided you store them in a cool, dry place. This stops the honey from fermenting or crystallizing prematurely.
When you’re storing frames, keep an eye on temperature and humidity. The room’s gotta be cool, but not cold—think cellar-cool. Too much moisture can spell disaster for stored frames, potentially leading to mold growth or fermentation. Cover stored frames with a cloth or mesh to protect them, but make sure air can still circulate.
Timing your extraction is crucial, too. Waiting too long might impact the quality of your honey and means more work. The best time to extract? Soon after a good honey flow, when your frames are full and dry. Try aligning your extraction session with a good weather stretch, as a low-humidity day can make the whole process smoother.
Storage doesn’t just end with the frames. Consider how you’ll store the honey post-extraction. Airtight containers are your best friends, keeping your honey fresh and preventing fermentation. Find a cool, dark spot to store them, away from light and fluctuating temperatures. This ensures that your honey retains its flavor and consistency until you’re ready to use or sell it.
Evaluating the Worth of a Honey Extractor
Investing in a honey extractor might seem like a big step, especially if you’re just getting started. Is it worth the cost? For many beekeepers, that’s a resounding yes. The time and effort saved with an extractor can drastically change how you view honey harvesting.
A manual extractor is usually the more budget-friendly option, perfect if you’re just starting out or have fewer hives. They require more effort but help you keep initial costs low. An electric extractor, while more expensive, offers efficiency and ease – definitely a plus if you’ve got multiple hives or plan to scale up.
Think long-term. An extractor is a one-time purchase that, when maintained well, could last for years. The time saved during each honey harvest can quickly add up, with less physical strain and more honey processed per session. The initial cost often pays off, making it a worthwhile investment for many bee enthusiasts.
Consider it an investment into the sustainability and efficiency of your hobby or small-scale operation. You’re not just buying a tool; you’re buying time, ease, and a potentially higher yield. That extra honey can mean more products to share, sell, or simply enjoy.
In the end, whether you choose manual or electric depends on your specific needs and future goals. Assess your budget, the size of your operation, and how much value you place on the ease of processing – it’s all about finding what works best for your unique setup.
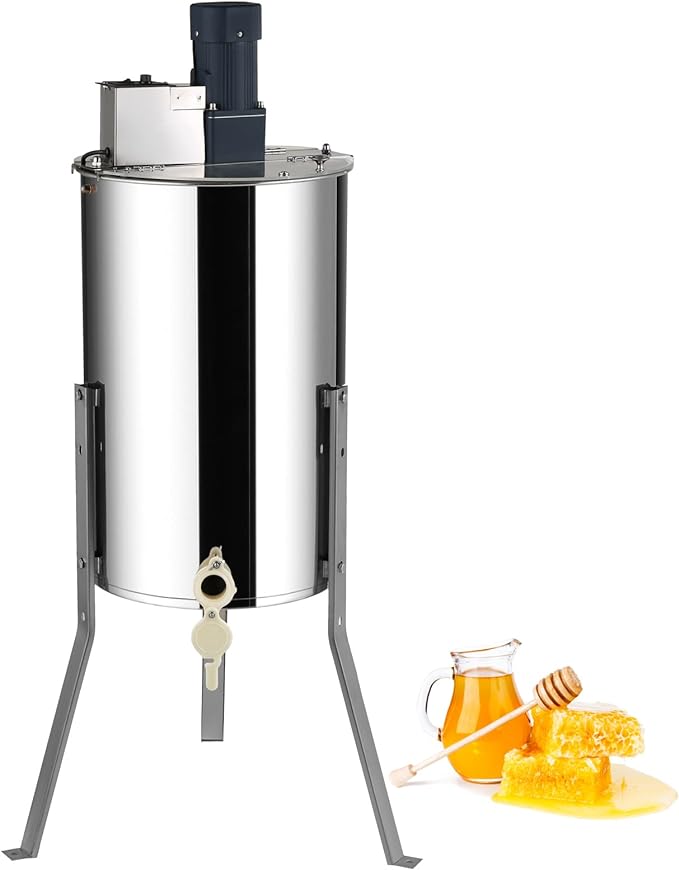
It’s time to enjoy the sweetest harvest of your life with our honey extractor equipment!
2 Models available: 2/4 Frame and 4/8 Frame Electric Honey Extractor. Material: Polished Stainless Steel. A powerful 140W extractor with an adjustable speed of up to 1300 rpm. Adapted Honeycomb Size: Deep: 18.9” x 9” / 48 x 23 cm and Medium: 18.9” x 6.3” / 48 x 16 cm.
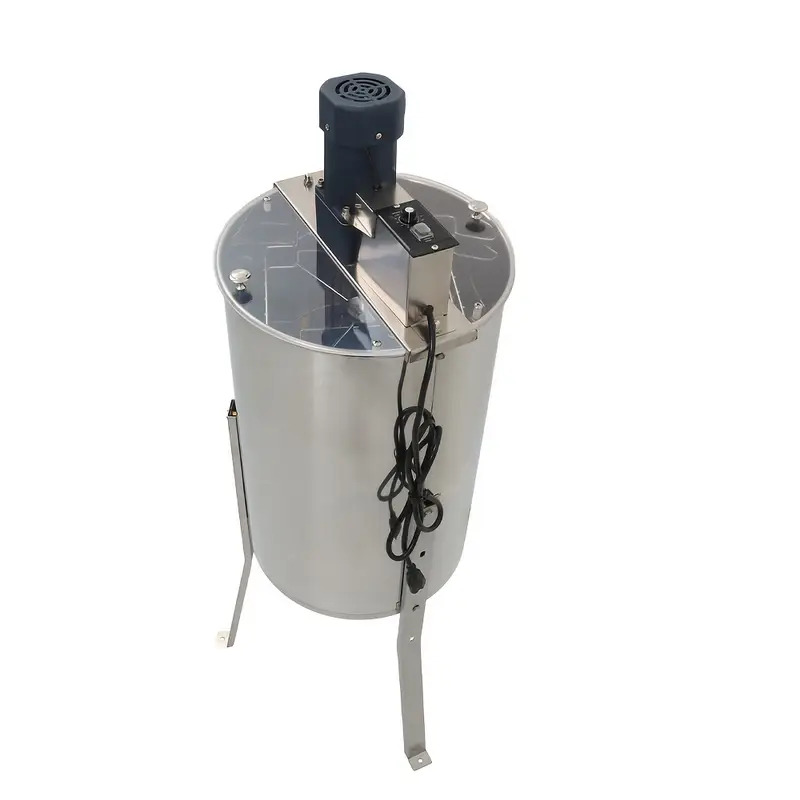
2/ 4 Frame Honey Extractor, Electric Honey Extractor, Stainless Steel Honeycomb Spinner Drum with Transparent Lid and Adjustable Height Stands. The Electric Honey Extractor have an 140w, 1300rpm motor, High Speed and Low Noise, Speed can be adjusted to keep working efficiency up to 1300 rpm..

Beekeeping for Beginners is a treasure trove of step-by-step instructions to help you build your first DIY beehive and nurture a flourishing honey bee colony.
The book will teach you how to make your bee colony thrive and assist you in all the most critical beekeeping activities and decisions. From choosing the perfect hive to installing your bee colony, this book covers all the essentials. Learn how to inspect your hive, harvest honey, and even turn your new-found hobby into a profitable business.
This post may contain affiliate links.
Thank you for sharing this detailed guide on setting up a honey extraction room!
As someone who raises animals and is interested in beekeeping, I found your tips incredibly valuable. Creating a dedicated space for extraction sounds like a great way to streamline the process and ensure everything is sanitary.
Do you have any recommendations for must-have equipment or tools for beginners who are just starting to harvest honey? I’d love to hear your insights on making the process as efficient and enjoyable as possible!
Angela M. 🙂
Hi Angela!
Thank you for your comments and questions!
Yes, the firt step is to ensure you have a good clean place with enough space for extraction and to handle all the frames without bees coming inside.
Next is to get a good honey extractor and here I will recomend to get a electric honey extractor from start even if they comes with a higher cost. Because when you expand and start build up some more hives, it’s hard doing the extration with a manual one.
You also need uncapping tool and filter equipment with at least three different filter mesh, coarse, medium and fine mesh filter. It’s good to have a larger canister with a tap to collect the honey from the filters to make it easier to fill the jars.
Last but not least you need have some type of jars or bottles prepared to store your honey after extracting and filtering.
I wish you good luck in your honey production!
/Mats